Backup Data CloudPanel ke Google Drive
Pengantar
Melakukan backup data website sering kali dianggap sebagai pekerjaan teknis yang rumit, padahal sebenarnya ini adalah langkah sederhana yang bisa menyelamatkan banyak hal di kemudian hari. Banyak pemilik website baru menyadari pentingnya backup setelah mereka mengalami kehilangan data, mulai dari file yang tidak sengaja terhapus hingga serangan keamanan yang membuat website tidak bisa diakses. Pada situasi seperti ini, backup menjadi penyelamat utama.
CloudPanel memberikan fasilitas manajemen server yang ringan dan efisien, dan ketika digabungkan dengan layanan penyimpanan seperti Google Drive, proses backup menjadi jauh lebih aman dan mudah. Anda tidak perlu lagi khawatir ketika melakukan update, mengubah konfigurasi, atau menambah fitur baru pada website. Cukup pastikan bahwa file penting dan database selalu tersimpan di tempat yang aman.
Menghubungkan CloudPanel ke Google Drive adalah salah satu langkah paling bijak untuk menjaga keamanan data, terutama jika website Anda sudah mulai berkembang. Dengan dukungan server Plasawebhost yang stabil, proses backup berjalan lebih cepat dan lebih lancar, sehingga Anda tidak perlu khawatir dengan performa ataupun kesalahan teknis yang sering terjadi pada layanan hosting yang kurang optimal.
Memahami cara melakukan backup bukan hanya tentang teknis, tetapi juga tentang persiapan diri menghadapi berbagai kemungkinan yang bisa terjadi pada website Anda. Ini adalah investasi kecil yang memberikan rasa tenang dalam mengelola layanan digital.
Cara Setting Backup Google Drive di CloudPanel
- Install Rclone di Server
Pertama, install Rclone di server CloudPanel kamu:
curl https://rclone.org/install.sh | sudo bashSetelah selesai, pastikan Rclone berhasil di-install:
rclone version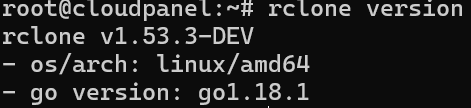
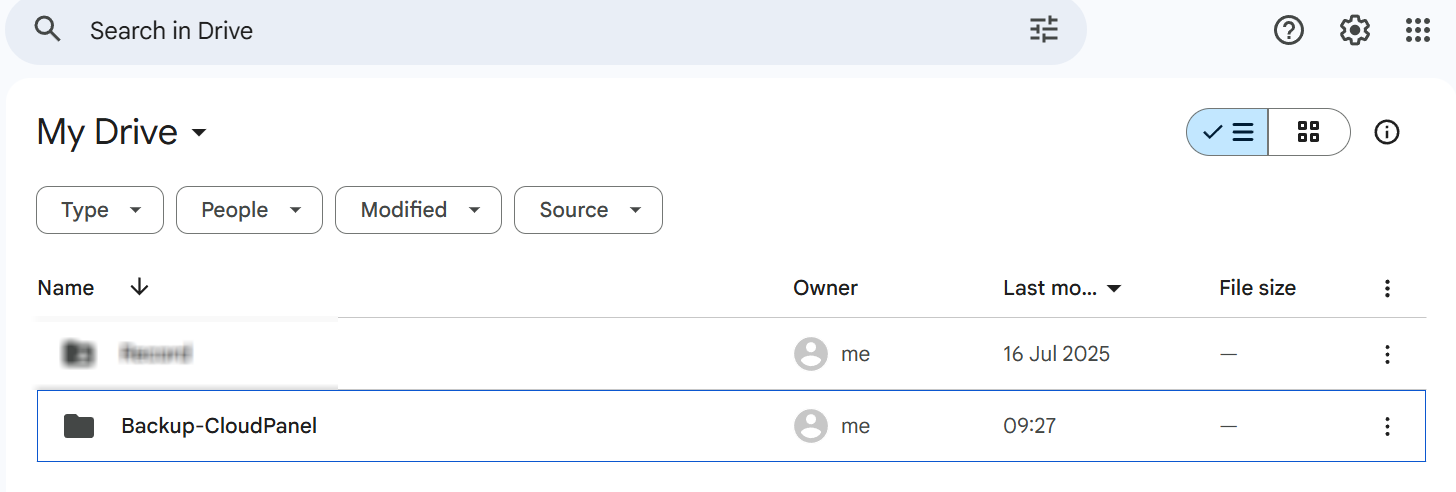
- Buka Browser di komputer local
- Login dulu ke akun Google Drive yang akan digunakan untuk backup.
- Buat Folder untuk Backup disini saya buat dengan nama Backup-Cloudpanel
- Konfigurasi Rclone untuk Google Drive
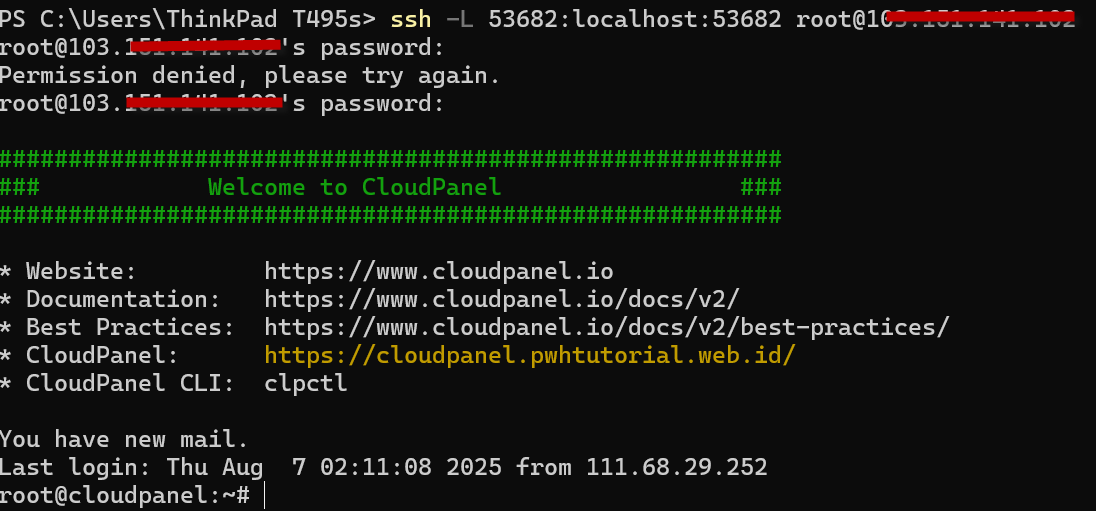
Di terminal komputer lokal, jalankan:
ssh -L 53682:localhost:53682 user@IP_SERVERGanti:
-
user dengan user server kamu (biasanya root)
-
IP_SERVER dengan IP address server
*Biarkan terminal ini tetap terbuka.
-
- Jalankan Konfigurasi di Server
Masuk ke server lewat SSH, lalu jalankan:
rclone configLalu pilih opsi Google Drive:
root@cloudpanel:~/.config/rclone# rclone config
2024/03/14 13:54:24 NOTICE: Config file "/root/.config/rclone/rclone.conf" not found - using defaults
No remotes found - make a new one
n) New remote
s) Set configuration password
q) Quit config
n/s/q> n
name> remote
Type of storage to configure.
Enter a string value. Press Enter for the default ("").
Choose a number from below, or type in your own value
 1 / 1Fichier
   \ "fichier"
 2 / Alias for an existing remote
   \ "alias"
 3 / Amazon Drive
   \ "amazon cloud drive"
 4 / Amazon S3 Compliant Storage Provider (AWS, Alibaba, Ceph, Digital Ocean, Dreamhost, IBM COS, Minio, Tencent COS, etc)
   \ "s3"
 5 / Backblaze B2
   \ "b2"
 6 / Box
   \ "box"
 7 / Cache a remote
   \ "cache"
 8 / Citrix Sharefile
   \ "sharefile"
 9 / Dropbox
   \ "dropbox"
10 / Encrypt/Decrypt a remote
   \ "crypt"
11 / FTP Connection
   \ "ftp"
12 / Google Cloud Storage (this is not Google Drive)
   \ "google cloud storage"
13 / Google Drive
   \ "drive"
14 / Google Photos
   \ "google photos"
15 / Hubic
   \ "hubic"
16 / In memory object storage system.
   \ "memory"
17 / Jottacloud
   \ "jottacloud"
18 / Koofr
   \ "koofr"
19 / Local Disk
   \ "local"
20 / Mail.ru Cloud
   \ "mailru"
21 / Microsoft Azure Blob Storage
   \ "azureblob"
22 / Microsoft OneDrive
   \ "onedrive"
23 / OpenDrive
   \ "opendrive"
24 / OpenStack Swift (Rackspace Cloud Files, Memset Memstore, OVH)
   \ "swift"
25 / Pcloud
   \ "pcloud"
26 / Put.io
   \ "putio"
27 / SSH/SFTP Connection
   \ "sftp"
28 / Sugarsync
   \ "sugarsync"
29 / Transparently chunk/split large files
   \ "chunker"
30 / Union merges the contents of several upstream fs
   \ "union"
31 / Webdav
   \ "webdav"
32 / Yandex Disk
   \ "yandex"
33 / http Connection
   \ "http"
34 / premiumize.me
   \ "premiumizeme"
35 / seafile
   \ "seafile"
Storage> 13
** See help for drive backend at: https://rclone.org/drive/ **

Google Application Client Id
Setting your own is recommended.
See https://rclone.org/drive/#making-your-own-client-id for how to create your own.
If you leave this blank, it will use an internal key which is low performance.
Enter a string value. Press Enter for the default ("").
client_id>
OAuth Client Secret
Leave blank normally.
Enter a string value. Press Enter for the default ("").
client_secret>
Scope that rclone should use when requesting access from drive.
Enter a string value. Press Enter for the default ("").
Choose a number from below, or type in your own value
 1 / Full access all files, excluding Application Data Folder.
   \ "drive"
 2 / Read-only access to file metadata and file contents.
   \ "drive.readonly"
   / Access to files created by rclone only.
 3 | These are visible in the drive website.
   | File authorization is revoked when the user deauthorizes the app.
   \ "drive.file"
   / Allows read and write access to the Application Data folder.
 4 | This is not visible in the drive website.
   \ "drive.appfolder"
   / Allows read-only access to file metadata but
 5 | does not allow any access to read or download file content.
   \ "drive.metadata.readonly"
scope> 1
ID of the root folder
Leave blank normally.

Fill in to access "Computers" folders (see docs), or for rclone to use
a non root folder as its starting point.

Enter a string value. Press Enter for the default ("").
root_folder_id>
Service Account Credentials JSON file path
Leave blank normally.
Needed only if you want use SA instead of interactive login.

Leading `~` will be expanded in the file name as will environment variables such as `${RCLONE_CONFIG_DIR}`.

Enter a string value. Press Enter for the default ("").
service_account_file>
Edit advanced config? (y/n)
y) Yes
n) No (default)
y/n>
Remote config
Use auto config?
 * Say Y if not sure
 * Say N if you are working on a remote or headless machine
y) Yes (default)
n) No
y/n>
If your browser doesn't open automatically go to the following link: http://127.0.0.1:53682/auth?state=lJ52bPvVGaG
Log in and authorize rclone for access
Waiting for code...
Got code
Configure this as a team drive?
y) Yes
n) No (default)
y/n>n

--------------------
[remote]
scope = drive
token = {"access_token":"ya29.a0Ad52N3_J72wn8dG4c","token_type":"Bearer","refresh_token":"1//0czUgUBU95R8GCgYIARAAG-JK9klco7JLyA","expiry":"2024-03-14T14:55:20.87391752Z"}
--------------------
y) Yes this is OK (default)
e) Edit this remote
d) Delete this remote
y/e/d>
Current remotes:

Name                 Type
====                 ====
remote               drive

e) Edit existing remote
n) New remote
d) Delete remote
r) Rename remote
c) Copy remote
s) Set configuration password
q) Quit config
e/n/d/r/c/s/q> q
Dalam proses di atas, kamu akan melihat bahwa pilihan-pilihan berikut telah dipilih:
-
n) New remote – untuk membuat file konfigurasi baru
-
name> remote – kamu harus memberikan nama ini secara persis, karena CloudPanel hanya akan mengenali nama ini
-
Storage> 13 – ini adalah pilihan untuk Google Drive
-
client_id – tekan Enter saja, tidak perlu diisi
-
client_secret – tekan Enter saja, tidak perlu diisi
-
scope> 1 – akses penuh ke semua file, kecuali Application Data Folder
-
root_folder_id – tekan Enter
-
service_account_file – tekan Enter
- Edit advanced config? – n) No (default) – gunakan pengaturan default (No)
-
Use auto config? – y) – pilih Yes,
-
http://127.0.0.1:53682/auth?state=LK_cdbrOrI – link ini akan diberikan, buka di browser lokal kamu untuk mendapatkan token
- Configure this as a team drive? pilih No
-
y) Yes this is OK (default) – pilih Yes untuk menyimpan remote yang telah dikonfigurasi
-
e/n/d/r/c/s/q> q – ketik q untuk keluar dari pengaturan
-
- Login kedalam account CloudPanel
- Cari Admin Area kemudian klik icon tersebut

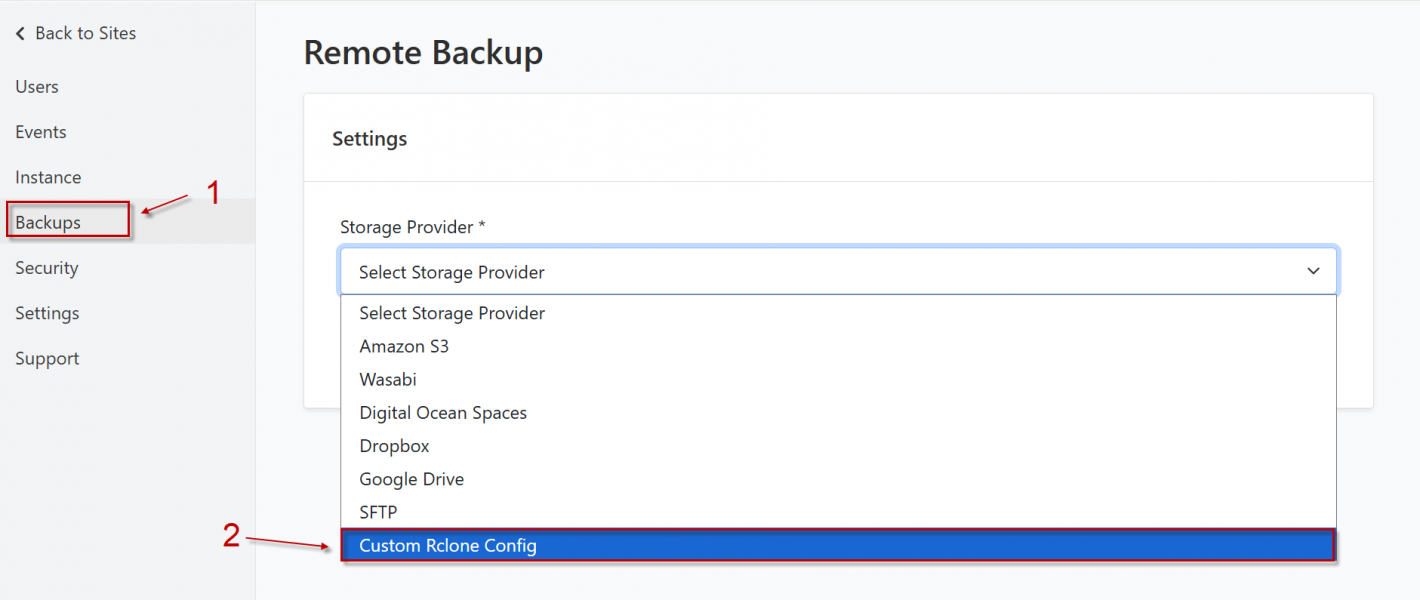
- kemudian masuk kedalam menu backup dan pilih custom rclone config
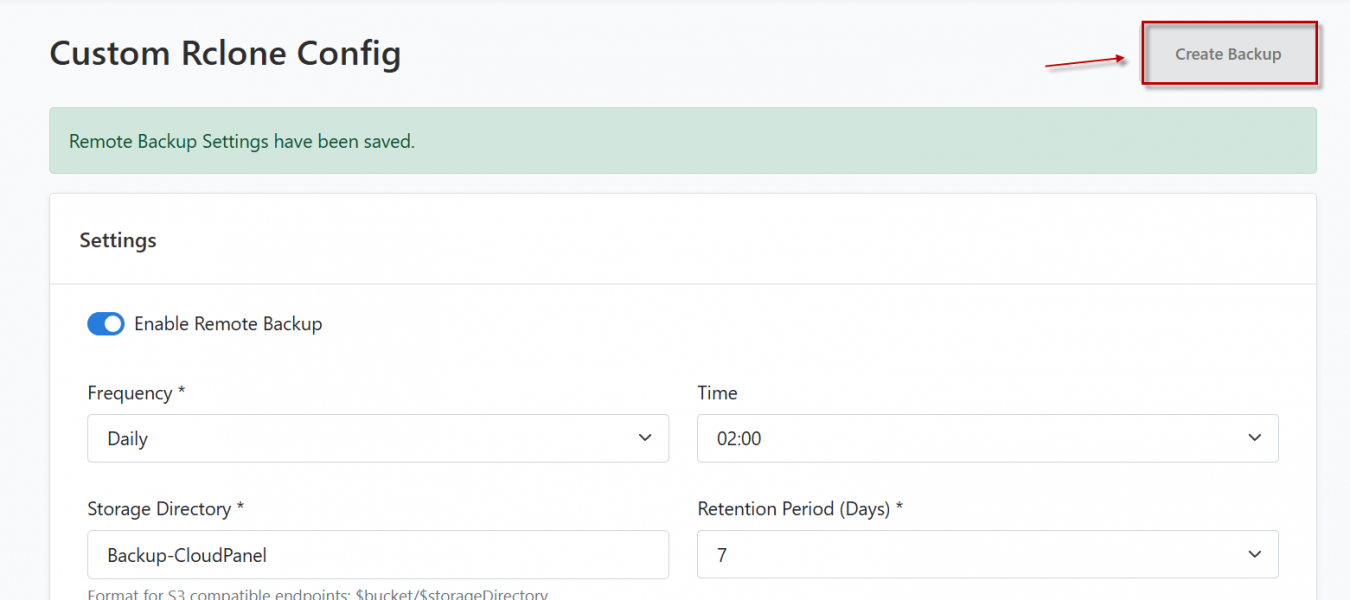
- Pastikan enable kemudian sesuaikan untuk nama storage directory sesuaikan dengan nama folder gdrive yang telah dibuat kemudian save

- Kemudian pilih create backup untuk mulai melakukan backup
- Kemudian cek kedalam gdrive apakah sudah muncul untuk file backup

Kesimpulan
Backup data dari CloudPanel ke Google Drive merupakan langkah penting untuk menjaga keamanan website, terutama bagi Anda yang menjalankan bisnis, platform pendidikan, layanan publik, atau website organisasi. Dengan melakukan backup secara rutin, Anda memiliki salinan aman yang bisa dipulihkan kapan saja jika terjadi masalah.
Proses ini sebenarnya tidak serumit yang dibayangkan. Begitu langkah-langkahnya dipahami, Anda bisa membuat rutinitas backup secara otomatis dan tidak lagi perlu mengecek setiap file secara manual. Bahkan untuk pemula sekalipun, mengatur backup ke Google Drive bisa dilakukan dengan mudah.
Jika Anda menggunakan layanan Cloud VPS atau Dedicated Server dari Plasawebhost, proses backup akan terasa jauh lebih stabil dan cepat. Hal ini karena konfigurasi server yang sudah dioptimasi, jaringan yang cepat, serta support yang siap membantu ketika Anda membutuhkan panduan tambahan. Semua ini memberikan kenyamanan lebih bagi Anda dalam menjaga keamanan data website.
Pada akhirnya, menjaga data bukan hanya soal teknis, tetapi juga soal ketenangan pikiran. Ketika backup sudah berjalan dengan baik, Anda bisa fokus mengembangkan website tanpa rasa khawatir. Dengan CloudPanel, Google Drive, dan server Plasawebhost, menjaga data tetap aman menjadi lebih mudah dan bisa dilakukan oleh siapa saja.